Configure a custom domain for your AWS Amplify App
A custom domain lets you share your AWS Amplify App with the world. This tutorial will show you how to do just that.


You've created an AWS Amplify App and you're ready to share it with the world. You need a custom domain. AWS Amplify and Route 53 make it easy and this guide will step you through it!
If you want your own portfolio site, start with my tutorial to setup your portfolio site in AWS Amplify under 30 minutes.
Before you get started
You'll need a few things. You may already have some of them:
- Setup an AWS Account
- Deployed AWS Amplify App
- Custom domain name
This tutorial will use Google Domains as the example, but each domain provider has the same custom name server capability. Simply run a search for your provider.
If you have been following along with my tutorial to build a portfolio site, all you will need is your custom domain. I would suggest your name (dot) me. As an example, my custom domain name is: http://jacoborshalick.me
If that's not available, consider adding your middle name or initial.
Setup your custom domain in Route 53
Login to the AWS Console. Once logged in search for Route 53 and open it. When you get to the Route 53 Dashboard, select Hosted Zones in the left column.
This will display any existing hosted zones, or none if you haven't created any yet. Here you want to select the Create hosted zone button.

Now enter your domain name and a description for your site. Once you have entered this information, click Create hosted zone.

You will now see your domain name listed in the Hosted zones. Click on your domain name. Here you will see an NS record.

These are the name servers for DNS routing. Just copy the 4 name servers somewhere so you can use them when we configure your domain provider.
Setup AWS Amplify with your custom domain
In the AWS Console, search for AWS Amplify and access it. Here you will select your AWS Amplify App first.
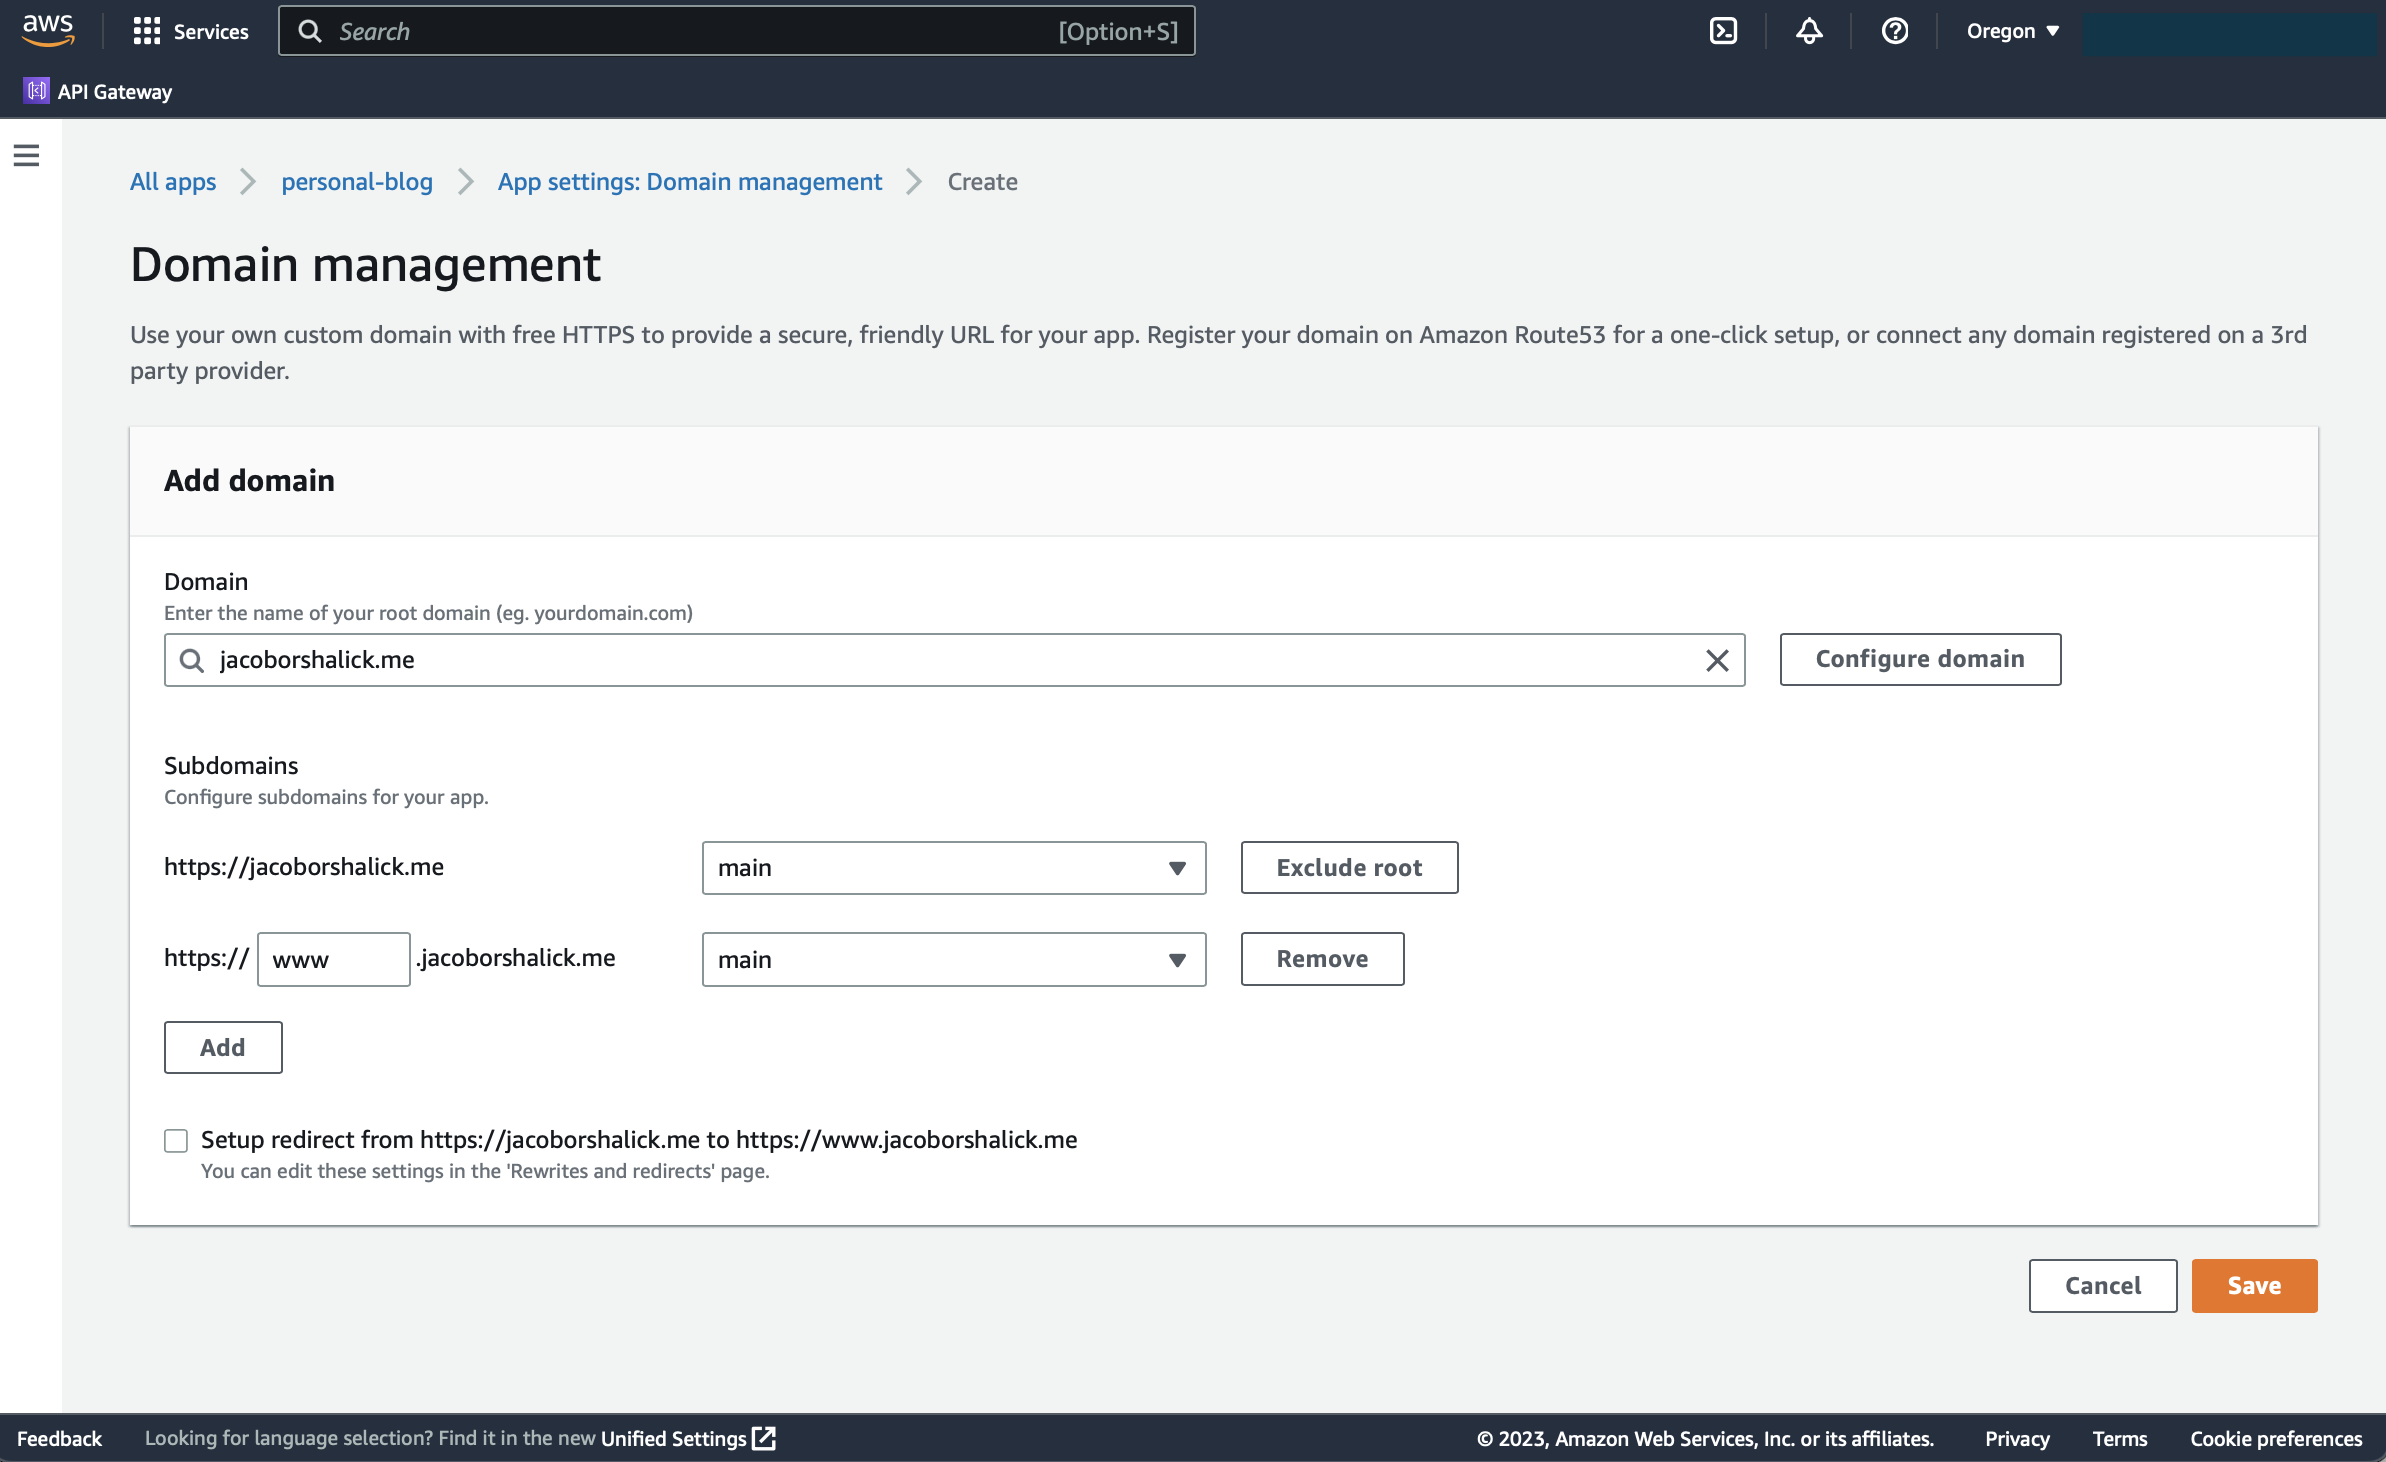
Once selected, click on the Domain Management in the left navigation panel. In the Domain Management interface, click the Add Domain button on the upper left.

Here you should see the domain you just configured in Route 53 when you select the dropdown. Select it and click Configure Domain.

Uncheck "Setup redirect from..." and click the Save button.
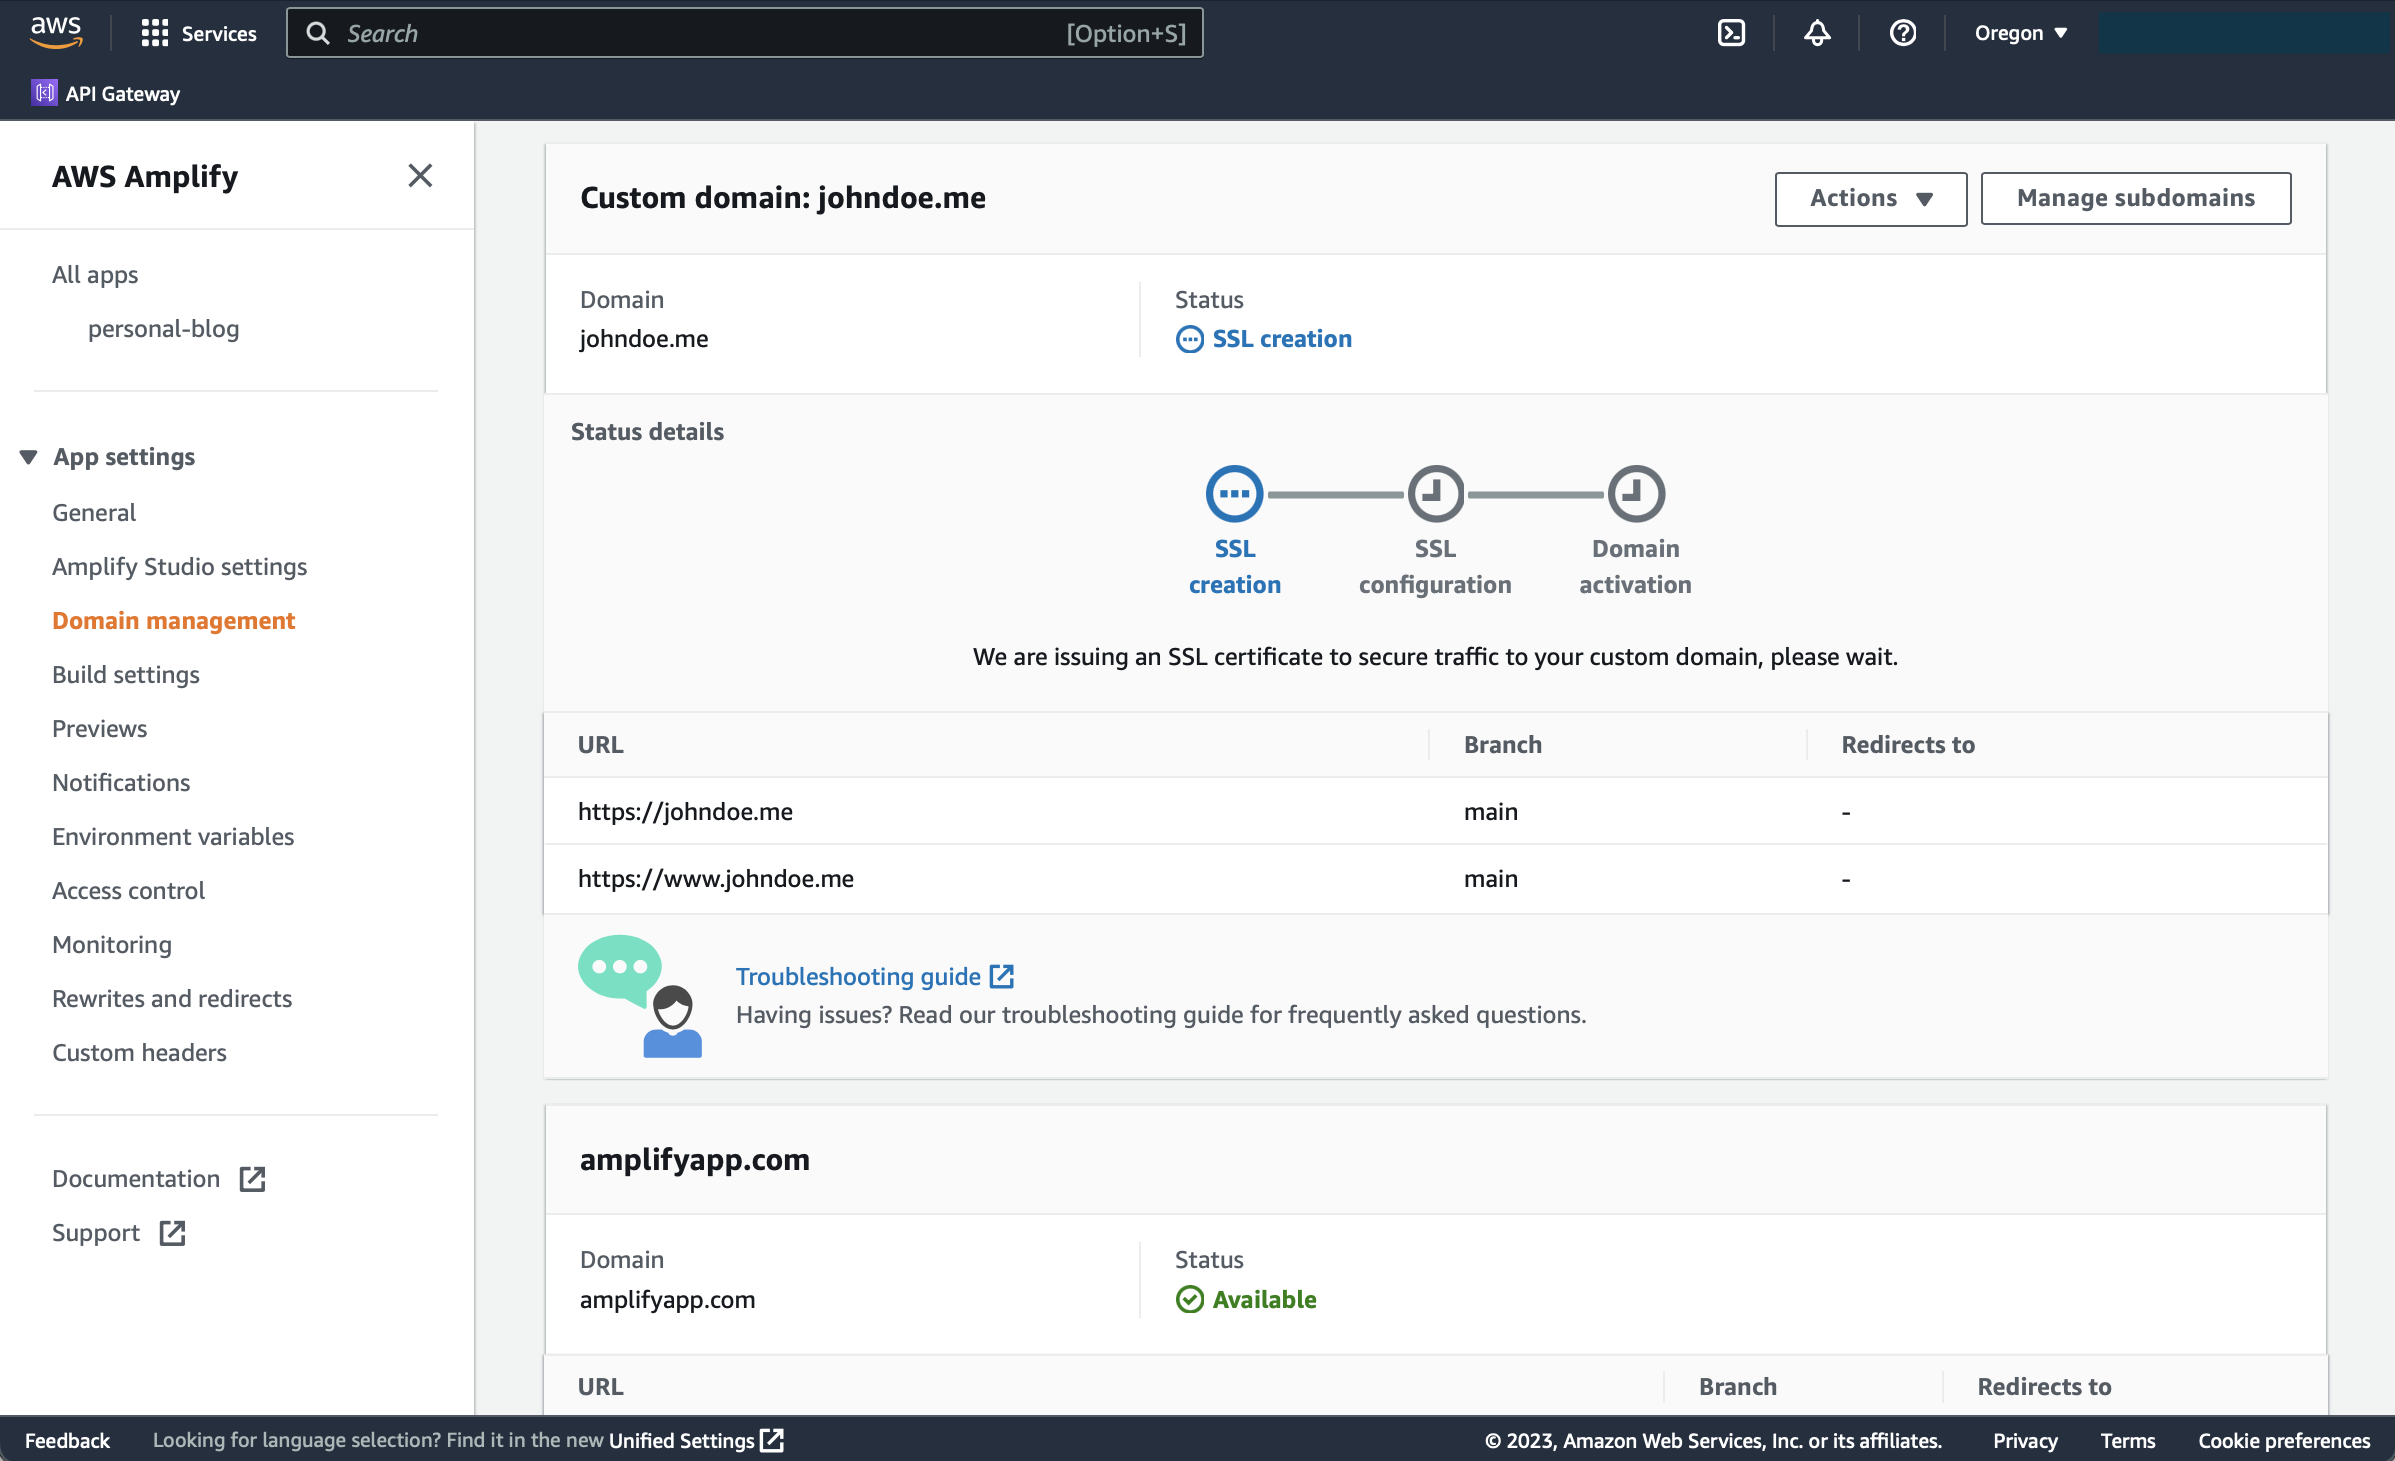
At this point, AWS Amplify will start to configure SSL for your site. This will take some time. Wait until the Domain Activation step is complete before moving on to the next step.

Configure the Custom name servers on your domain provider
You now need to point your domain provider to the Custom name servers you copied in the previous step. You copied them somehwere right? If not, you can always go back to Route 53 and find them. For simplicity, I will use Google Domains as the example here.
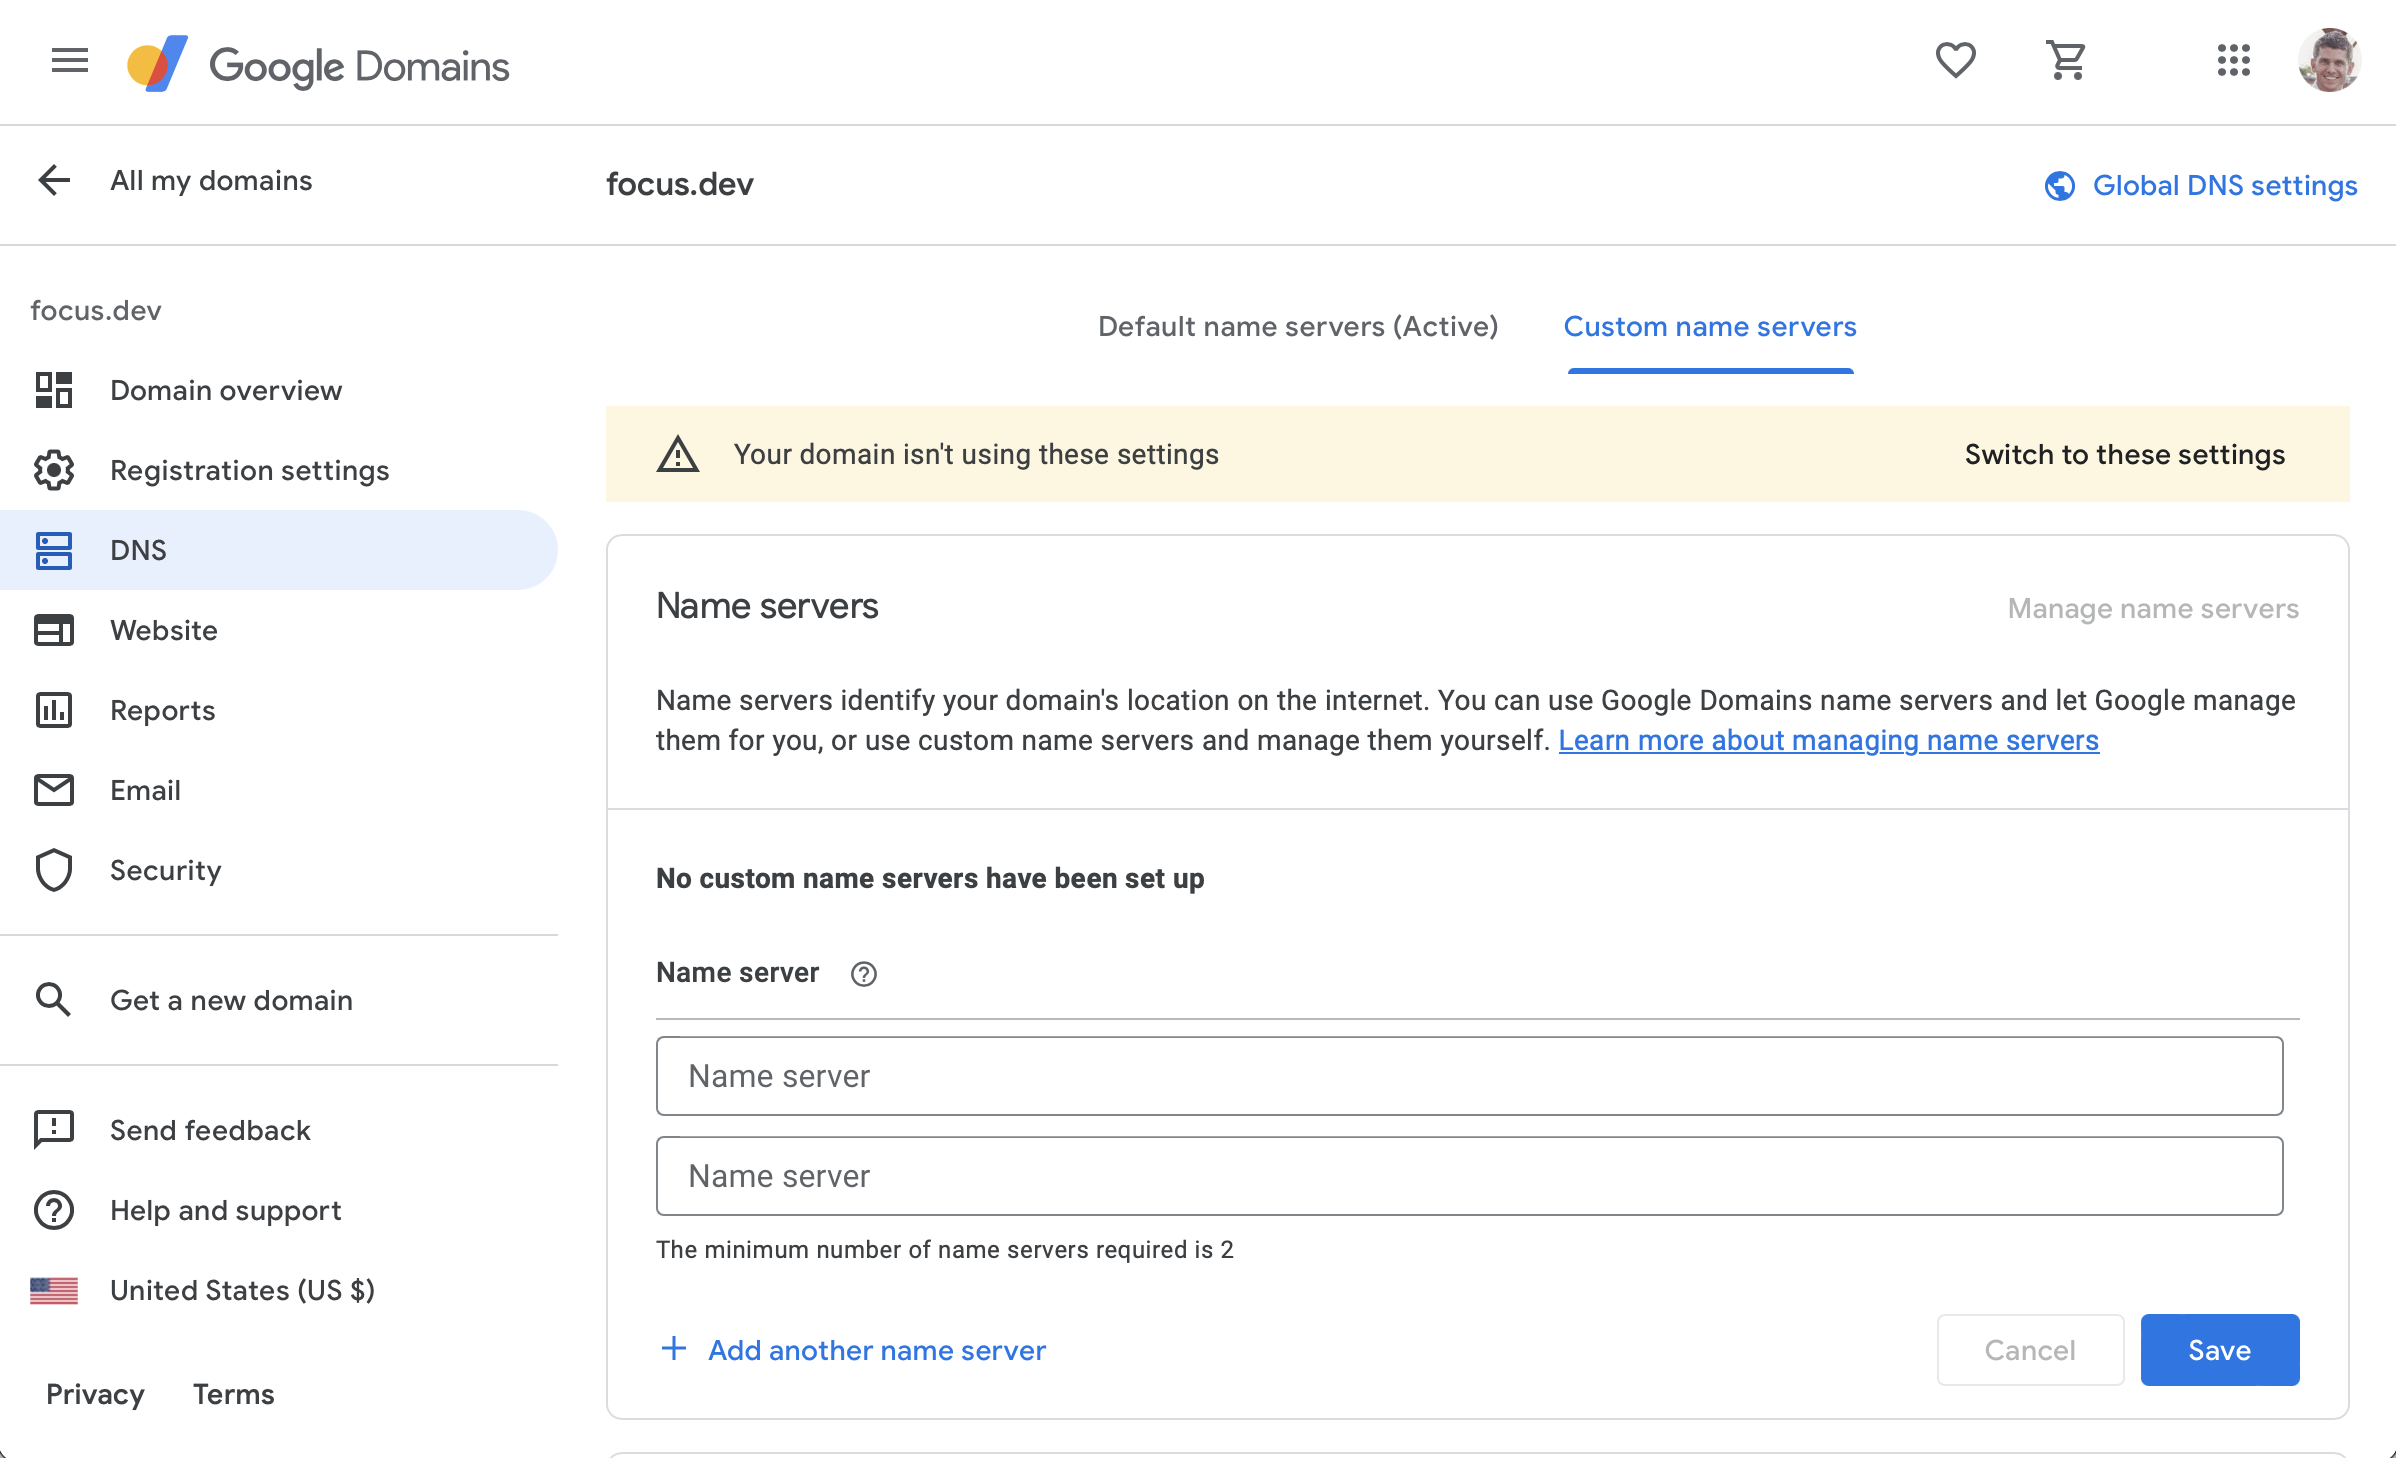
In Google Domains, you would select your custom domain. Once selected, you would then select DNS in the left navigation.
The Default name servers will be configured to start with. Select the Custom name servers tab.

You will see a warning that Your domain isn't using these settings. Select Switch to these settings and add all 4 custom name servers you copied into the Name server input list.
Note: Make sure there is not an extra period at the end of any of your name server hostnames.
Once you have copied them in, select Save.
Access your AWS Amplify App through your custom domain
That's it! You will now be able to access your AWS Amplify App from your custom domain name.
Be aware that while the DNS replication will likely happen very fast, it could take some time. Give the replication at least a couple of hours before you assume it's not working.